


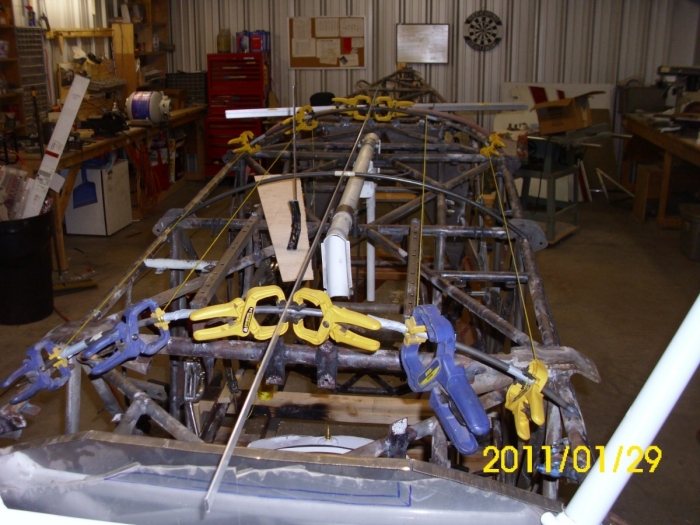
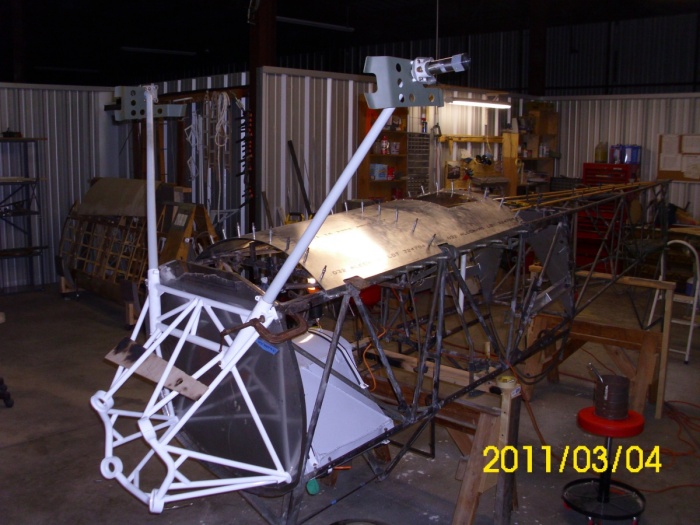
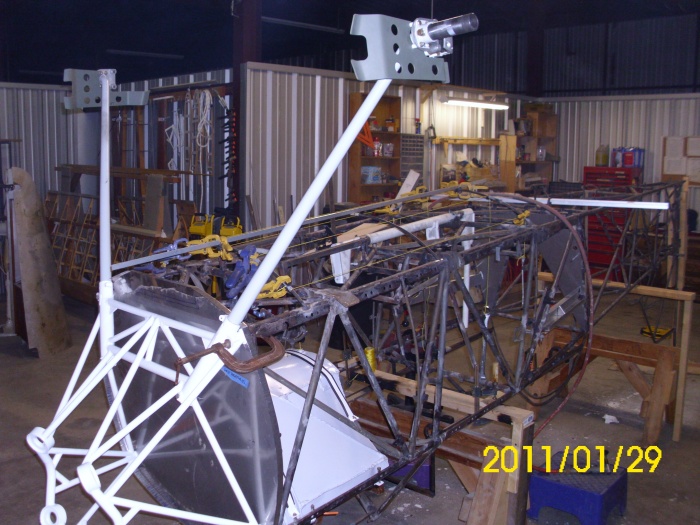
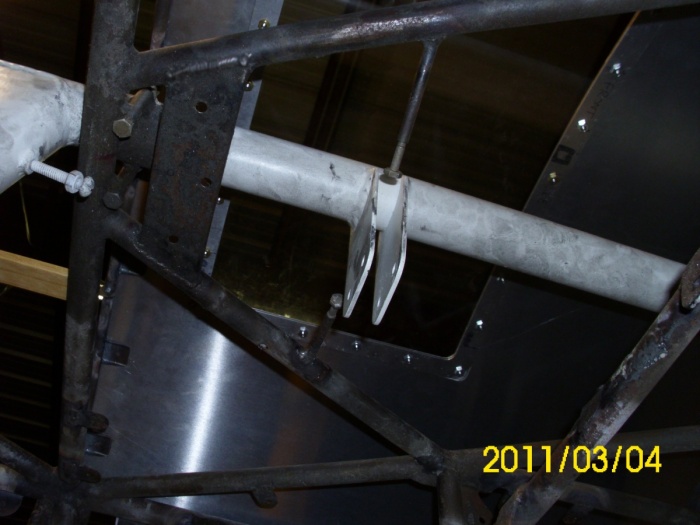
Canopy Mechanism
The mechanism is now moving along rapidly. All moving parts have been created, invented and tweaked; I am now at the point where I need the bubble. I do have an old 70's bubble, but over 35+ years, the protective film had fused into the plexiglass :0|. A new one is on order, smoke gray, in color. The mechanism is a spin off from biplaneforum user, Tommyj (thanks Tommy), with a few tweaks of my own thrown in (it seems us builders always have to throw something in!). So, as stated this is on hold till the bubble arrives. This is a video link of the mechanism (previously posted):
[ame="http://www.youtube.com/watch?v=hliI3QsJ3B8"]http://www.youtube.com/watch?v=hliI3QsJ3B8[/ame]
For those interested, I will be writing up a Skybolt Builders Manual chapter for the canopy. I also plan on writing a chapter for my Skybolt RV/Whitmann landing gear mod, but I am not sure whether to hold off on that until the darn thing has landed a few dozen times!
Sheet Metal
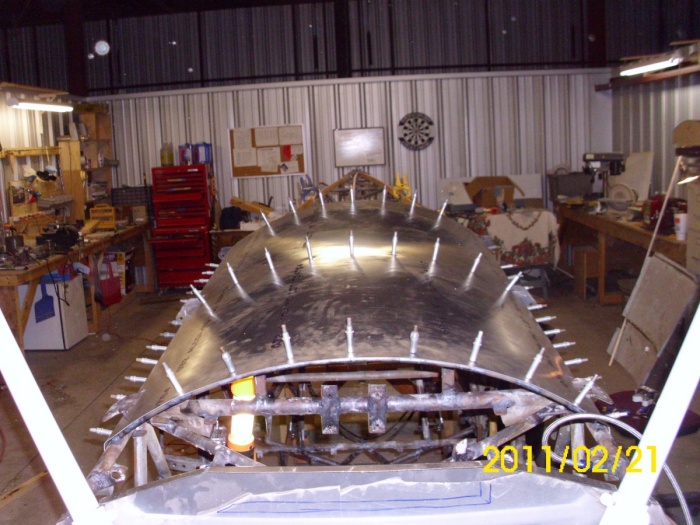
I decided to flip the plane over and tackle my first ever aluminum skin fabrication. The belly was as good a starting point as any (maybe subconsciously I chose the belly because you then couldn't see the mess I might make!). I then realized I had no belly formers welded on :0|. So, I decided to use 3/8 tubing, formed over a propane bottle, and got to work making and welding on the 3 million tabs. Adding these belly formers and tabs was not easy; alignment is obviously the key, and to get everything aligned was a real challenge. I got close enough where there are only 2 or 3 tabs that may need some slight shim stock for when the screws finally clamp down - not bad, considering all that steel movement, from welding...
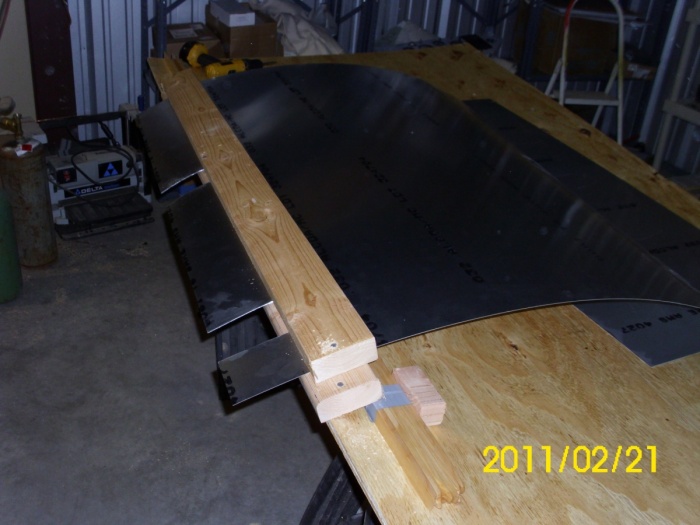
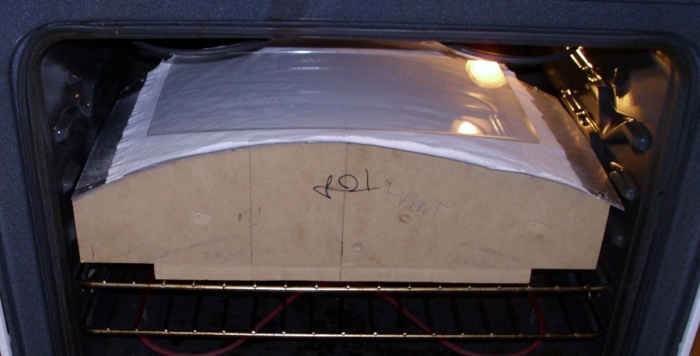
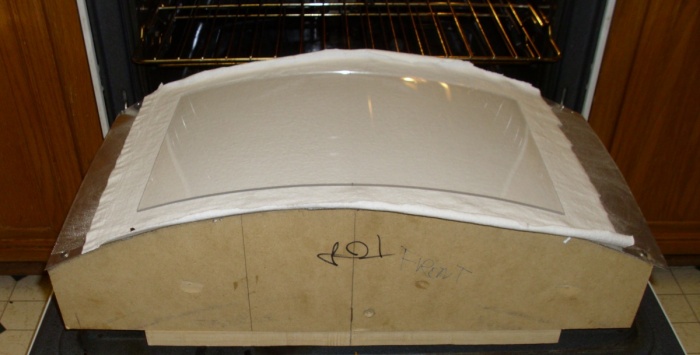
The sheet was 6061-t6 x 0.032. I decided on that for the belly for durability reasons. I also decided I wanted an aerobatic sight window. This I made from plexiglass, formed in an oven; I followed Neil's article on windscreen forming for this. I also decided to get the aluminum sheet slip rolled to the correct radius, this really helped during layup. I almost trashed the first attempt; after getting it rolled for $50 at a fab' shop, I bent the flanges down the sides with a radiused edged 2x4, but for the life of me I could not get the thing to bend over evenly. It looked a mess. I decided to take it to a buddy who had a 4 ft brake, we padded out the brake former with a couple of scrap pieces so as to increase the radius, and lo and behold, the clamping action of the box pan brake coupled with the resulting bend straightened everything out! So, my first ever skin was not a redux. Nice. I started to focus upon building an exhaust ramp, then realized I really couldn't, since I needed to work from the nose backwards for the right visual lines.
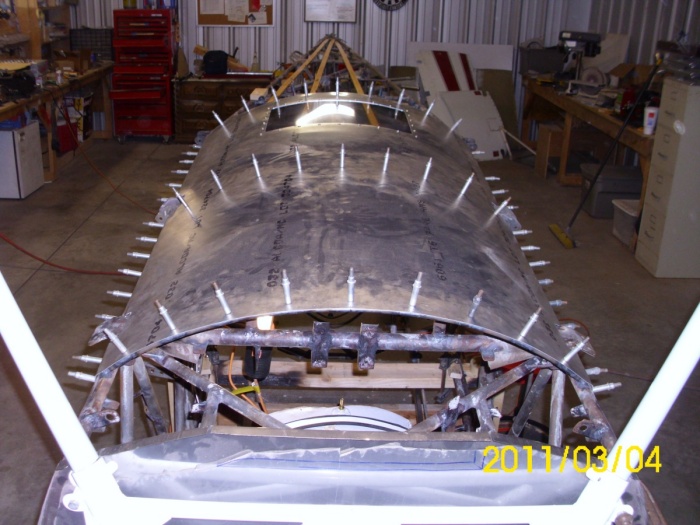
While the plane was inverted, I took the opportunity to permanently install the gear legs into the engine mount sockets. I temp' fitted the tailwheel, then three of us flipped the plane over - to see it sat there, on its gear, nose pointing skywards, was very cool, since I wasn't expecting the cool moment.
Now, I am working on fitting the new tailwheel (airplane parts), and looking at the first side skin. This skin is going to be a b***H, since one side, near the end, will have a gentle compound curve. Ugh.

The mechanism is now moving along rapidly. All moving parts have been created, invented and tweaked; I am now at the point where I need the bubble. I do have an old 70's bubble, but over 35+ years, the protective film had fused into the plexiglass :0|. A new one is on order, smoke gray, in color. The mechanism is a spin off from biplaneforum user, Tommyj (thanks Tommy), with a few tweaks of my own thrown in (it seems us builders always have to throw something in!). So, as stated this is on hold till the bubble arrives. This is a video link of the mechanism (previously posted):
[ame="http://www.youtube.com/watch?v=hliI3QsJ3B8"]http://www.youtube.com/watch?v=hliI3QsJ3B8[/ame]
For those interested, I will be writing up a Skybolt Builders Manual chapter for the canopy. I also plan on writing a chapter for my Skybolt RV/Whitmann landing gear mod, but I am not sure whether to hold off on that until the darn thing has landed a few dozen times!
Sheet Metal
I decided to flip the plane over and tackle my first ever aluminum skin fabrication. The belly was as good a starting point as any (maybe subconsciously I chose the belly because you then couldn't see the mess I might make!). I then realized I had no belly formers welded on :0|. So, I decided to use 3/8 tubing, formed over a propane bottle, and got to work making and welding on the 3 million tabs. Adding these belly formers and tabs was not easy; alignment is obviously the key, and to get everything aligned was a real challenge. I got close enough where there are only 2 or 3 tabs that may need some slight shim stock for when the screws finally clamp down - not bad, considering all that steel movement, from welding...
The sheet was 6061-t6 x 0.032. I decided on that for the belly for durability reasons. I also decided I wanted an aerobatic sight window. This I made from plexiglass, formed in an oven; I followed Neil's article on windscreen forming for this. I also decided to get the aluminum sheet slip rolled to the correct radius, this really helped during layup. I almost trashed the first attempt; after getting it rolled for $50 at a fab' shop, I bent the flanges down the sides with a radiused edged 2x4, but for the life of me I could not get the thing to bend over evenly. It looked a mess. I decided to take it to a buddy who had a 4 ft brake, we padded out the brake former with a couple of scrap pieces so as to increase the radius, and lo and behold, the clamping action of the box pan brake coupled with the resulting bend straightened everything out! So, my first ever skin was not a redux. Nice. I started to focus upon building an exhaust ramp, then realized I really couldn't, since I needed to work from the nose backwards for the right visual lines.
While the plane was inverted, I took the opportunity to permanently install the gear legs into the engine mount sockets. I temp' fitted the tailwheel, then three of us flipped the plane over - to see it sat there, on its gear, nose pointing skywards, was very cool, since I wasn't expecting the cool moment.
Now, I am working on fitting the new tailwheel (airplane parts), and looking at the first side skin. This skin is going to be a b***H, since one side, near the end, will have a gentle compound curve. Ugh.